Style -- 6 days ago

Comfort comes from small tolerances, one link too many and the watch wanders, one too few and it nags all day. With decent light and a gentle touch, you can work out how to size a watch bracelet without leaving a mark.
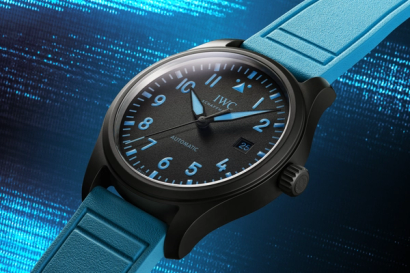
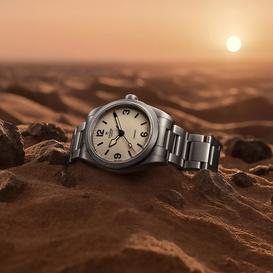
A watch bracelet is one of those small details that quietly separates the put together from the merely expensive. Too loose and the watch skates around your wrist like it has somewhere else to be. Too tight and you’re left with a faintly purple hand and the unmistakeable air of a man chastised by his own preferences. The right fit is simple. The watch sits centred on the wrist bone. It stays put when you move. It feels secure without announcing itself.
Sizing a bracelet is also one of the few bits of watch ownership you can do at home, provided you approach it with patience and the correct tools. This is not a hard job. It’s a precise one, which is why impatience makes it feel hard. Nothing here is generous. The parts are tiny, and a dropped screw will roll once, disappear under a chair, and stay there.
Consider this a clean run-through: the main bracelet types, the tools worth using, and the mistakes that cost time and temper. Prefer not to touch it? A jeweller or watchmaker can take it off your hands. Learning how it works yourself is still useful, because wrists respond to heat, travel, and the general drama of daily life.

Fit begins with where the watch sits. The case should sit just above the wrist bone, not on top of it and not sliding down towards the hand. The watch should not rotate around the wrist when you type, walk, or gesture. A little movement is normal. Constant movement is not.
The comfort test is simple. You want room for a finger under the bracelet without forcing it, but not enough space to slip two in without trying. If the watch leaves a deep mark, it is too tight. If the watch can spin, it’s too loose. If it starts the day feeling fine and ends it tight, you probably need a half-link, a clasp micro-adjustment, or a slightly looser fit that allows for swelling.
If you wear the watch in warm climates or during travel, plan for expansion. A bracelet that fits perfectly on a cold day in London can feel punitive in August in Rome.
You can do this with very little, but the right tools reduce the chances of scratching something you will later pretend you are not bothered by.
Clasp adjustments and bracelet removal are easiest with a spring-bar tool. Screw-linked bracelets, meanwhile, need a proper watchmaker’s screwdriver set. A pin pusher tool and a small hammer help with pin and collar bracelets. A bracelet sizing block is inexpensive and makes the whole process calmer. Painter’s tape or masking tape protects the bracelet and clasp from stray tool marks. A soft cloth gives you a safe surface. A small tray or a shallow dish helps you keep tiny parts from vanishing.
If you have a high-end bracelet with polished centre links, be especially careful. Those surfaces show marks that are the way white trainers show regret.

Most bracelets fall into two camps. Screw links and pin links. Some brands also use pins with collars, meaning small sleeves inside the link that keep everything secure. The problem is they’re easy to lose and tedious to replace, so it pays to know they’re there before one goes flying.
How do you tell? Look at the side of the links. Small screw heads mean a screw-linked bracelet. If you’re seeing holes or arrows on the underside, you’re almost certainly dealing with pins, with the arrows marking the exit route. If there’s any uncertainty, stop there and either check the model or take it to a professional. Guesswork has a habit of turning a quiet morning into a correction.
Before you remove anything, put the watch on and centre it on your wrist. Note how much slack you have. Keep the clasp centred under the wrist by taking links from both sides. Once it drifts off to one side, it’s uncomfortable and looks sloppy.
Remove links from both sides where you can. If the bracelet is fixed on one side or built unevenly, you’ll have to compromise. Still aim for balance. Also, remember that many clasps have micro-adjustment positions. Use those for fine-tuning rather than forcing the fit purely with links.
A good approach is to remove fewer links than you think you need, then refine with micro-adjustment. You can always take one more out. Reinstalling links is possible, but it is slower, and it increases the risk of scratches and lost parts.

Work on a clean surface with good light. Tape the bracelet near the area you will handle to reduce scratches. Locate the screw heads on the side of the links you plan to remove.
Use the correct screwdriver size. If it feels loose in the screw head, stop and use a better-fitting driver. A poorly fitting driver slips and scars the screw. It also makes you dislike yourself.
Turn the screw slowly. Some brands use threadlocker. If the screw is stubborn, apply steady pressure and keep the driver perfectly aligned. Do not twist at an angle. Once the screw is out, set it aside immediately. Separate the link. Remove the required number of links.
To reassemble, insert the pin back in the opposite direction of the arrows, which is usually how it locks correctly. Ensure collars are seated properly. Push the pin in until flush. Then check the link movement.
Once done, check that each screw is secure. Then flex the bracelet gently to ensure it articulates properly.
Pin systems rely on friction. They can be simple pins or pins with collars. Look for arrows on the underside of the bracelet, which indicate the direction the pin should be pushed out. Place the bracelet on a sizing block. Align the pin with the block’s channel.
Use a pin pusher tool or a link removal tool to push the pin out in the direction of the arrow. If it resists, use a small hammer and a pin punch with controlled taps. Controlled is the operative word. You are persuading, not punishing.
Once the pin starts moving, you can usually pull it out with pliers, ideally with tape on the jaws to avoid marks. Remove the link, then repeat as needed. If collars are involved, note where they sit and how they come out. Some sit in the middle link. Some sit in the outer link. Keep them paired with their pins.
To reassemble, insert the pin back in the opposite direction of the arrows, which is usually how it locks correctly. Ensure collars are seated properly. Push the pin in until flush. Then check the link movement.

Many modern clasps include micro-adjustment holes or a sliding adjustment system. This is where you achieve that last millimetre of comfort. If your watch has a tool-free extension system, use it. Brands like Rolex, Tudor, Omega, and others often include clever adjustment features that allow you to loosen the bracelet slightly during the day without removing links.
If your clasp has micro-adjustment holes, you move the spring bar to a different position. This is best done with a spring-bar tool. Move it one step at a time. Try the fit. Repeat until it feels right.
Micro-adjustments are also useful seasonally. Slightly looser in summer. Slightly tighter in winter. This is not indulgence. It is physiology.
The first mistake is removing too many links at once. Work gradually. The second mistake is scratching the clasp and polished links. Tape is cheap. Regret is not.
Another common error is failing to keep the clasp centred. Remove links evenly when possible. If you cannot, prioritise comfort and then accept a small visual compromise. It is better than a clasp that digs into the wrist all day.
The most annoying mistake is losing tiny parts, especially collars. Work over a tray. Go slowly. If something drops, do not move your chair like an animal. Freeze. Look. Retrieve.
Finally, know when to stop. If the smartwatch bracelet uses unusual screws, if the pins are stubborn, or if you have an expensive bracelet with delicate finishing, a watchmaker’s fee is a small price to avoid permanent marks.

A good bracelet fit is the difference between wearing a watch and enduring it. When the fit is right, the watch disappears on the wrist. It becomes part of your day rather than an object you keep adjusting. It also looks better, because watches are designed to sit in a certain position, with the dial presented properly and the case balanced.
Sizing a bracelet is a small act of care. It is not obsessive. It is respectful. A fine watch deserves to be worn comfortably and confidently. Anything else is just jewellery that keeps slipping, which is faintly undignified for everyone involved.
To receive the latest in style, watches, cars and luxury news, plus receive great offers from the world’s greatest brands every Friday.